REPAIR & OVERHAUL GUIDE
A workshop and field-level guide to identifying, removing, and replacing universal joint cross kits and bearing cups on round baler PTO shafts — covering tool requirements, series-specific dimensions, yoke ear inspection, and reinstallation verification.
Replacing the universal joint cross kit on a round baler PTO shaft is one of the most cost-effective maintenance tasks in the driveline service cycle. A complete cross and bearing cup kit costs a fraction of the price of a full shaft assembly replacement, and — when installed before the yoke ear bore is damaged — restores the shaft to original performance without any loss of torque capacity or dimensional integrity. The challenge is timing: most operators replace the cross too late, after the bearing cup has already spalled and the needle rollers have scored the yoke ear bore, at which point a cross kit alone is no longer sufficient. Detecting cross wear early — through the routine radial play check described in this guide — keeps the repair within the scope of a kit replacement rather than a full shaft replacement.
This guide covers the complete cross kit replacement procedure for Series 4, 6, and 8 round baler PTO shafts, including how to identify the correct kit dimensions by series, how to remove and reinstall the bearing cups without damaging the yoke ear bore, how to inspect the yoke for damage that indicates whether a kit repair is still viable, and what grease specification and interval the reinstalled joint requires to reach its expected service life.
What Is a PTO Shaft Cross Kit and When Does It Need Replacement?
A universal joint cross kit — often called a U-joint cross kit or spider kit — consists of the hardened steel cross body, four bearing cups, four sets of needle rollers, and the associated seals and circlips that retain each cup in its yoke ear bore. The cross transmits torque between two shafts at an angle by allowing each yoke to rotate around one axis of the cross while the other axis accommodates the intersecting shaft. Each time the shaft rotates through one full revolution, the cross completes two full bending cycles — meaning that at 1000 RPM, the cross experiences approximately 2,000 load reversals per minute. The needle rollers in each bearing cup roll against the precision-ground surface of the cross trunnion under this cyclic load.
Replacement is needed when the needle rollers have worn the trunnion surface to the point where the cup can move radially within the yoke ear — detectable as a slight click or wobble when the cross is moved by hand with the shaft stationary. At this stage the bearing cup surface is also worn, and the needle roller contact path is no longer circular but elliptical — meaning the contact stress has risen and the remaining service life before fracture is short. The correct approach is to replace the entire cross kit — cross body, cups, needles, seals, and circlips — as a matched set rather than replacing individual components. Mixing a new cross with worn cups or vice versa produces an inconsistent fit and shortened service life in the replacement parts.
Manufacturing Construction: Cross and Bearing Cup Specifications by Series
The cross kit specification is series-dependent and cannot be interchanged between Series 4, 6, and 8 shafts. The cross body dimensions, trunnion diameter, cup bore, and needle roller diameter all scale with the series number. Using a Series 4 cross in a Series 6 yoke is not possible — the trunnion is physically too small for the larger cup bore — but a Series 6 cross in a Series 6 yoke with an incorrectly sourced kit where the cup bore is marginally oversized is a subtler error that creates a loose fit and early failure.
| Série | Cross Trunnion Diameter | Cup Outer Diameter | Needle Roller Qty per Cup | Peak Torque Rating | Aplicação típica |
|---|---|---|---|---|---|
| Series 4 | 22 mm | 35 mm | 14–16 | ~1,200 Nm | Smaller 540 RPM balers, under 60 PTO HP |
| Series 6 | 27 mm | 42 mm | 18–20 | ~2,100 Nm | JD 469/569, CASE IH, Krone, NH BR7000 at 1000 RPM |
| Series 8 | 35 mm | 52 mm | 22–24 | ~3,500 Nm | Heavy-duty silage and high-density crop applications |
Material System: What a Quality Cross Kit Contains
| Componente | Material | Surface Specification | Function |
|---|---|---|---|
| Cross body | Aço liga 20CrMnTi | Carburised, case-hardened 58–62 HRC; ductile core | Transmits torque at angle; resists fatigue and shock peaks |
| Bearing cups | 52100 bearing steel | Through-hardened, precision-ground bore surface | Houses needle rollers; transfers radial load to yoke ear |
| Needle rollers | 100Cr6 bearing steel | Through-hardened, precision diameter tolerance | Rolling contact between trunnion and cup bore |
| Lip seals | Elastômero NBR ou FKM | Dual-lip or triple-lip depending on series | Retains grease; excludes water, crop debris, and dust |
| Circlips | Spring steel | Phosphate-coated | Retains bearing cup in yoke ear bore; prevents axial cup movement |
The seal specification is often overlooked when comparing cross kits. A dual-lip seal — standard on many economy kits — allows some moisture ingress under high-pressure washing or submersion in standing water during wet silage seasons. A triple-lip seal, found on quality agricultural series kits, provides an additional exclusion layer at the outer diameter and substantially extends grease retention time in both dry and wet field environments. For baler applications in wet-climate regions such as the UK, Ireland, New Zealand, and northern France, the triple-lip seal specification is worth confirming before ordering a cross kit.
Yoke Ear Inspection: Determining Whether a Kit Is Sufficient
Before ordering a cross kit, the yoke ear bore must be inspected to confirm that it can still hold a replacement cup correctly. A yoke ear that has been run with a failed cross — one that was already cracked or whose cups had spalled — will have damage to the bore surface that prevents a new cup from seating concentrically. The four conditions that rule out a cross kit repair and require full shaft replacement are: scoring on the bore surface visible as longitudinal scratches or gouges at the needle roller contact zone; distortion of the bore from circular to oval due to a cross fracture under load; cracking at the base of the yoke ear around the cup bore; and fretting corrosion that has removed material uniformly from the bore diameter, leaving it larger than the cup’s specified interference fit range.
The simplest field check is to insert the new cup into the bore by hand before pressing. A cup that slides into the bore without resistance — or that can be pushed to the bottom of the bore without the circlip seat — indicates the bore is oversized. A cup that requires light pressing force to seat concentrically and stops short of the circlip groove under hand pressure indicates correct bore condition. If the bore passes this check, a cross kit repair is viable. If the cup drops in freely or wobbles in the bore, the yoke ear is damaged and the shaft requires replacement regardless of the condition of the cross body itself.
Bore Scoring
Longitudinal marks on the inner bore surface from needle rollers that have broken free of the cup. Even light scoring changes the bore geometry enough to prevent uniform cup seating. A cross kit on a scored bore will develop play within a few operating hours.
Bore Ovality
A cross that fractured under load typically distorts one or both yoke ears from circular to slightly oval as the load is transferred to the ear walls rather than the cup. Measure the bore in two perpendicular directions with a bore gauge; more than 0.05 mm difference indicates ovality that requires full yoke replacement.
Ear Cracking
Visible surface cracks at the base of the ear around the bore perimeter are a critical failure indicator. These cracks propagate under torque loading and will cause the ear to fracture — releasing the cup and cross from the yoke during operation. Remove from service immediately.
Fretting Enlargement
Uniform bore enlargement from micro-movement of the cup under repetitive load. The bore develops a reddish iron oxide deposit and the cup sits with visible clearance rather than interference. A cross kit in an enlarged bore will generate noise and play from the first day of service.
Cross Kit Removal: Step-by-Step Procedure
Cross kit removal requires a bench vice or press, a set of correctly sized sockets to use as cup drivers, circlip pliers, and a clean work surface. The procedure is the same across Series 4, 6, and 8 shafts — only the cup dimensions change. Do not attempt to drive cups in or out with an open flame or by striking the yoke with a hammer directly; both methods crack the yoke ear or distort the bore, making the repair more extensive than the original fault.
Step 1 — Remove the shaft from the baler and tractor. The cross kit cannot be replaced with the shaft in place. See the field removal procedure in the relevant operator guide for your baler platform.
Step 2 — Remove circlips from all four bearing cup bores. Use circlip pliers in the correct external jaw size for the series. Do not pry circlips with a screwdriver — the circlip groove in the bore can be damaged, and a damaged groove cannot retain the new circlip under operating loads.
Step 3 — Press out the first cup. Support the yoke ear in a vice or press with the cup face accessible from above. Use a socket whose outer diameter is slightly smaller than the cup outer diameter as a driver — large enough to contact the cup rim, small enough to pass through the bore. Press the cup downward into the yoke cavity until it drops free. The cross will drop toward the open bore as the first cup comes free.
Step 4 — Press out the opposing cup. Reposition the yoke so the opposite ear is facing up and repeat. The cross body and the two remaining cups can now be lifted free of the yoke.
Step 5 — Remove the remaining two cups from the other yoke axis. Rotate the yoke to access the second pair of cross trunnions and repeat steps 3 and 4.
Step 6 — Clean and inspect all four bore surfaces before installing the new kit, as described in the yoke ear inspection section above.
Cross Kit Installation: Achieving the Correct Press Fit
Correct installation of a replacement cross kit depends on maintaining the bearing cup’s interference fit with the yoke ear bore. The cup is designed to be pressed into the bore at a light interference — typically 0.01–0.03 mm — which prevents it from rotating in the bore during operation. A cup that is pressed in too loosely will fret in the bore; one that is pressed in with excessive force may distort the cup and misalign the needle rollers relative to the trunnion surface. The correct procedure uses a press rather than hammer blows and relies on the socket driver method for controlled, parallel cup entry.
Step 1 — Pre-fill the needle roller cavities with grease. Before inserting the cross into the yoke, partially fill each bearing cup with clean EP2 grease. The grease holds the needle rollers in place during assembly and provides the first lubrication charge for the joint. Do not over-fill — excess grease displaces when the cup is pressed home and can prevent the circlip from seating.
Step 2 — Insert the cross into the yoke cavity. Position the cross body in the yoke so that the first pair of trunnions align with the first pair of bore openings. Hold the cross in position by hand while starting the first cup.
Step 3 — Press the first cup into the bore. Start the cup by hand — it should enter squarely without rocking. Use the socket driver to press it squarely into the bore until the circlip groove is just visible. Stop pressing when the groove is exposed; over-pressing seats the cup below the groove and prevents circlip installation.
Step 4 — Press the opposing cup and install both circlips. With the first cup at the correct depth, press the opposing cup from the other side until the groove on that side is exposed. Install both circlips before proceeding to the second axis — this prevents the first pair of cups from being pushed out while working on the second pair.
Step 5 — Repeat for the second axis. Rotate the yoke 90° and repeat the cup installation for the remaining two trunnions. Install the circlips on both cups before the joint is flexed.
Step 6 — Check articulation and grease. With all four cups installed and all circlips seated, flex the joint through its full articulation range by hand. Movement should be smooth with no binding or grating. Apply grease through the cross nipple until grease appears at the seal lips of all four cups — this confirms the grease path through the cross body is clear and all cups are receiving lubrication.
When a Cross Kit Is Not Enough: EP Round Baler PTO Shaft for CASE IH Round Balers
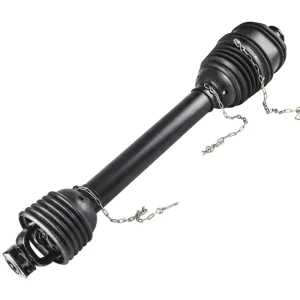
EP PTO Shaft for CASE IH Round Balers
When yoke ear inspection reveals bore scoring, cracking, or ovality that rules out a cross kit repair, a complete round baler PTO shaft replacement is the correct next step. This direct-fit replacement for CASE IH round baler platforms is assembled with Series 6 crosses manufactured from 20CrMnTi carburised steel with precision-ground 52100 bearing cups and triple-lip seals — the same construction quality that makes cross kit service life predictable and measurable. The guard assembly carries CE certification, and the lockback collar mechanism matches the CASE IH input shaft specification. Suitable for CASE IH baler operations in North America, Europe, and Australasia. A correctly specified replacement shaft starting with sound yoke geometry provides the best possible base for the next cross kit service interval.
Grease Specification and Lubrication Interval After Cross Kit Replacement
A newly installed cross kit starts its service life with the best possible grease charge — clean, correctly specified EP2 lithium complex grease, fully distributed through the cross body channels and seated at all four seal lips. Maintaining this condition across the operating season requires a defined grease interval and the correct grease type. Using the wrong grease — particularly a non-lithium or low-base-oil-viscosity product — causes seal lip swelling or shrinkage, which either destroys the seal’s exclusion function or makes it difficult to pump grease through the cross nipple.
The recommended greasing interval for a round baler PTO shaft cross kit under normal baling conditions is every 8 operating hours. In wet silage conditions — where water ingestion through the seal is more likely — grease every 4–6 hours and confirm that clean grease appears at all four seal faces after each regreasing, which indicates a clear grease path through the cross body. If grease does not appear at one or more seal faces after a normal greasing cycle, that cup’s grease path is blocked — typically by hardened old grease — and the cross should be removed for cleaning and regreasing before the blockage causes the needle rollers to run dry. Grease nipples that do not accept grease under normal pump pressure should be replaced immediately; a blocked nipple is the most common reason a cross is run dry despite a regular greasing schedule.
Adjacent Components to Inspect During Cross Kit Service
A cross kit replacement provides access to the shaft ends and the connection points at the tractor PTO stub and baler gearbox input — the inspection opportunity extends beyond the cross itself. The components that most frequently show early-stage damage at the same service interval as a cross kit replacement are the baler gearbox and the driveshaft slip clutch, both of which are easier to assess while the round baler PTO shaft is removed from the machine.
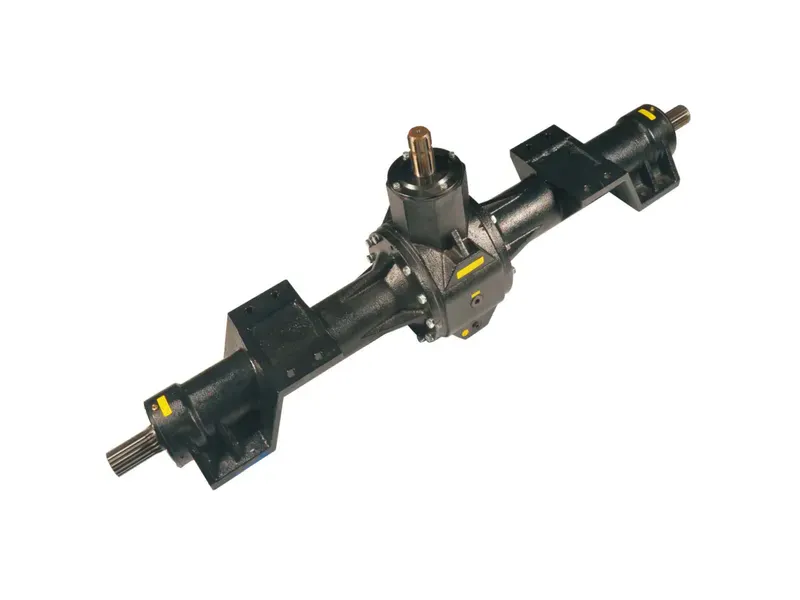
With the round baler PTO shaft removed, the baler gearbox input stub is accessible for inspection. Check the stub for locking groove wear, shaft runout by rotating slowly by hand, and any audible bearing noise when the shaft is turned. If the cross kit being replaced showed accelerated wear — less than one season of service — the gearbox input bearing is the likely cause; a damaged bearing runs with play that applies a cyclic side load to the adjacent cross through the implement-end yoke, doubling the stress on the new kit before it has completed its first season. Address the gearbox at the same service event to prevent repeating the cross kit replacement within the season.
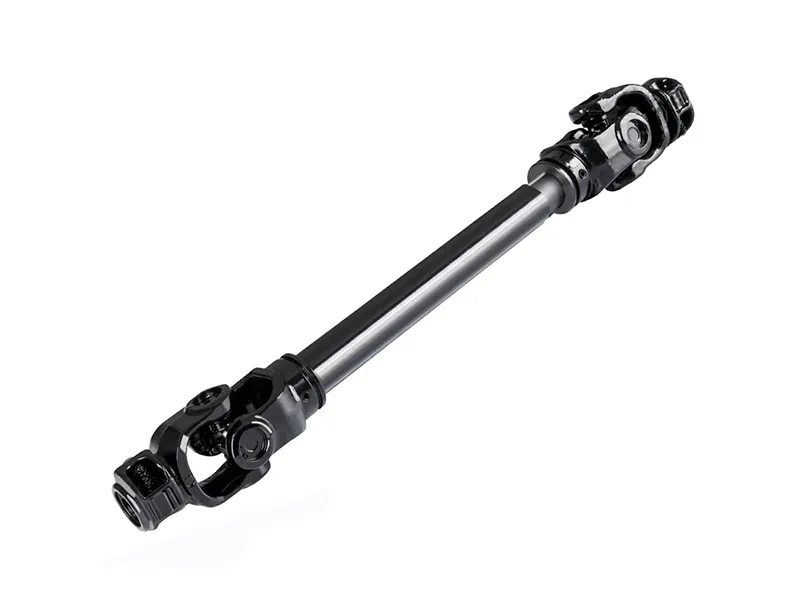
Eixo de transmissão universal da tomada de força
For operations that maintain a spare shaft assembly as a field replacement option, the universal PTO driveshaft is an efficient solution. A universal shaft in the correct series and length can carry a pre-fitted cross kit ready for installation, shortening the repair time from the multiple hours of a workbench kit replacement to the twenty minutes of a full shaft swap. The removed shaft then goes to the workshop for cross kit replacement at a time that does not interrupt the baling schedule — an approach that makes sense on larger operations where baling downtime has a direct revenue impact during a tight harvest window.
Sobre o fabricante
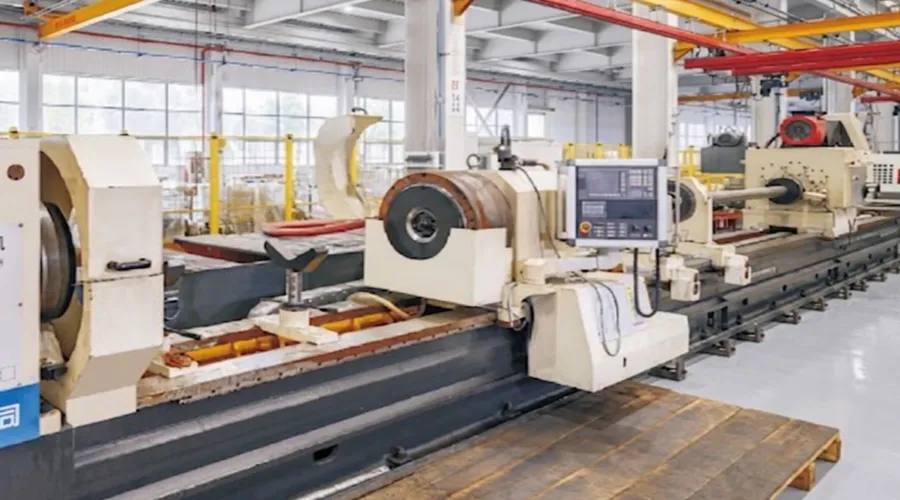
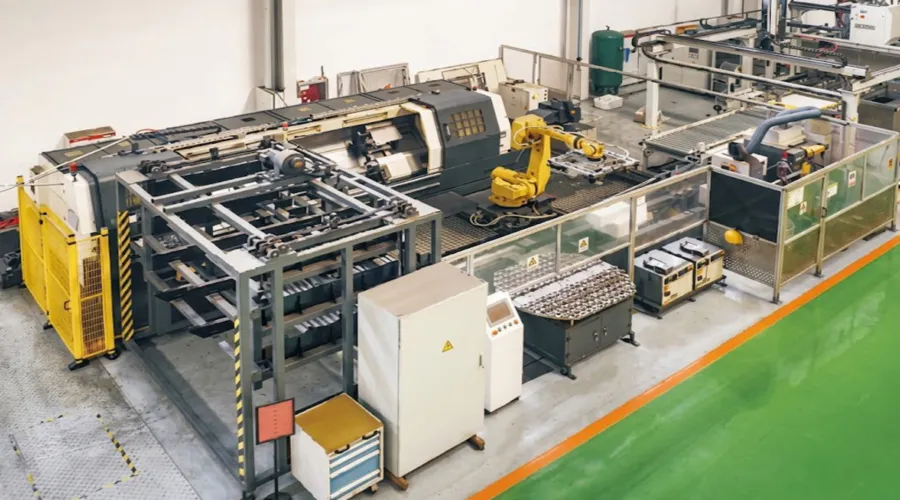
The product range covers agricultural gearboxes, worm gear reducers, planetary gear drives, power take-off shafts, hydraulic cylinders, gears, chains, and motors — all manufactured under ISO 9001:2015 quality management certification applied at every stage of production from incoming material inspection through assembly and final load testing. Structural housings and gearbox assemblies are produced in ductile iron, cast iron, cast steel, precision cast steel, and cast aluminium, selected by application load and thermal requirements. Beyond the standard catalogue, the engineering team manufactures custom components — sprockets, worm gears, precision shafts, pulleys, and complete assemblies — to customer drawings or application descriptions, with written quotation returned within 24 hours of a technical inquiry or component photograph.
Oficina


Perguntas frequentes
Editor: PXY